So, another week, another BatRep. This time I played against James with his Steel Phalanx ALEPH list. (Last week was against Garth, and went so badly I'd rather not talk about it). This time we played Nimbus Zone, in preparation for the upcoming tourney. The key objectives are to disable antennas, steal data, and control consoles at the end of the game.
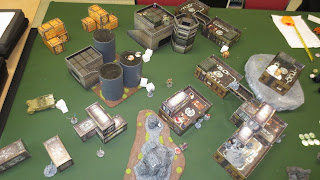
So this is a quick shot of the table I played Garth on last week. It's also roughly the state the table was in by the end of turn 2, by which I'd lost all but one model, and Garth had swept all the objectives.
…the dice just hated me.
Anyway, onto this week, and back to my terrain collection. James set it up, and decided we would play crosswise instead of lengthwise, an interesting choice. He chose to take initiative, so I chose to take the western DZ, and have him set up first.
Army lists will be at the end of the BatRep, as usual.
A shot of the table from my DZ, as James finishes setting up. He's got an Agema missile launcher on one rooftop, which is somewhat worrying, and another Agema covering the ruins and the forest on my right flank. He also has a TR bot behind the garage on the left, and Achilles, who can pretty much go anywhere with 6-4 move.
My deployment is actually quite conservative, with the Asura and Myrmidon officer backing each other up in the centre, the TR Bot and Agema forming an Evil Reaction Duo[TM], and one Netrod landing safe behind the main building, and the other scattering to land next to it.
James states by moving Achilles up, quite boldly, into the face of the TR bot and the missile Agema. One lucky dodge later and he decides maybe facing those two alone, at long range, is not the best use of Achilles prodigious CC skills.
Next, the Enomotarchos link moves up, successfully disabling the first Nimbus Antenna. The Chain Rifle Myrmidon breaks from the link to cover the antenna and the console.
The Enomotarchos link continues moving, the officer risking a shot from my officer's Boarding Shotgun.
The shot misses.
With his last order, James moves the Enomotarchos link up to claim the objective in his next turn.
I start by using the Proxy mk 5 to disable the first Antenna on my side of the table, then move up towards the data console (which won't activate until round 2).
The EVO bot uploads Assisted Fire to the TR bot, allowing it to ignore cover while shooting. This will prove crucial later.
The Proxy mk 2 attempts to take down the second to last antenna. She fails. Twice. On WIP 18! Third time, and second to last order, she finally manages it.
With my last order, I decide fuck it, I'm gonna try something different, and throw an E/M grenade over the wall with my Proxy mk 5.
It hits, quite well, in fact. The Myrmidon Hacker, and Eudoros, both fail their dodge, and their BTS rolls. Now they've been crippled as order generators and active/assault pieces.
This would wind up being the move that essentially won me the game. It broke the Enomotarchos link by Isolating the link leader, and due to the specialist (hacker) also being Isolated, she was down to a single order each turn, and was well away from any other objectives.
So, after taking down the final antenna with the isolated hacker (which is fully legal, as she wasn't HI, and thus not immobilized by the E/M hit), James decides to take the offensive and hunt my specialists.
…with the chain rifle Myrmidon.
Who tries his hand at pistol marksmanship against a long range TO
Camo target (my Proxy mk 2). He misses, and she misses her return shot.
The Agema missile launcher, however, blasts him into itty-bitty pieces.
Now, seeing my Agema as a significant threat, James responds in kind with his Agema. Unfortunately for him, my Agema decides to roll a crit.
Unfortunately for me, James's Agema passes both additional armour saves, meaning he's only unconscious, not dead.
James moves his TR bot out from behind the garage, into LoF of my TR bot. We both have same the target numbers. The same advantages (and his cover is cancelled by my Assisted Fire program).
Two TR bots enter, one TR bot leaves.
…James rolled well, but just slightly low. I rolled slightly better, scrapping his bot. The problem was it was a fair fight, and he couldn't stack advantages against me.
Next, Eudoros uses his order to take a shot, but my Myrmidon officer is faster with the smoke.
This then gives his officer a clean run up to my DZ. Now things are looking a little hairy.
His officer manages to duck past the TR bot's LoF, and shotguns my officer and Asura. The officer dodges successfully, the Asura does not (change facing roll, as LoF was obstructed by my officer, who uses her dodge to drop pron to prevent that happening again.
But that was his last order, and now that officer is swinging in the wind.
My Dasyu reveals herself, taking potshots at the officer and failing miserably.
The Asura shoots, wounding only once, but taking a Nanopulser blast in return, which also wounds my officer and the helper bot next to them.

Ignoring the officer as a losing game for now, I go back for objectives, taking the first data pack from the left hand console with my Proxy mk 5.
On the right flank (which I did not get pictures of …oops) my Proxy mk 2 Carbonited Achilles, stole the data from the right hand console, and then wailed on Achilles with AP rounds from her shotgun, wounding him twice.
Back to James, and his first action is to try his hand with Eudoros taking out my officer. Instead, we both crit, cancelling the attack. It appears as thought Eudoros sniped the grenade out of mid-air.
Now James pushes forward with Achilles on the right flank, firing his MULTI-rifle against my Proxy mk 2. She responds with her Nanopulser. Both models are knocked out of the fight.
In a last ditch effort to screw with my plans, James's officer fires his nanopulser again, killing my officer, and wounding the Asura a second time. Through some miracle, the helper bot passes its saves.
The Asura's unopposed DA ammo shot finally kills the officer. There is something to be said for having MSV 3 and engaging at point blank/
My missile Agema runs across the rooftops and vaults a jeep to get a clear shot at Eudoros. He succeeds at taking down the legendary Myrmidon, clearing a path for my final push.

Said push comes courtesy of my slow moving—but still useful, and more surprisingly, still alive—EVO bot. Which runs, climbs the main building, and downloads the final data pack from the central console.
The final score was 6-0, in my favour. James, I feel, was let down by two key factors (aside from his terrible rolls). The first is that he didn't deploy his reactive pieces—the twin Agemas—where they could effectively cover each other, allowing me to pick off the only one truly threatening my position. The second factor is that he didn't as aggressively as he could have with Achilles, especially if he'd chosen to run through the middle and engage at short range, instead of trying to snipe from the flanks that my reaction pieces had covered.
I know I got very lucky with that E/M grenade, as it's never a reliable tactic. My Dasyu may also have been deployed poorly, though she had good sight lines from that rear corner, she never really used them—but that may also be because I didn't feel I needed to reveal her until quite late. Additionally, the firefight in the middle of my DZ with James's officer could have gone better if I'd given it a little more thought, perhaps dodging first, then using a fresh order to fire once everyone was safely split up.
All in all, however, this list works really well, and is only a slight variation on my favourite list from N2 (having only added the missile Agema in place of an FO Naga).
My List: OwBgjAPgzCIQggGQKIAUASACeATAbgIYB2AxgKY6YDyADmQE4EAuAlgPZEDOmAKgZwGtMAMTb1yEACwBSAKwAOGQCYQwWdICESsNIBs4adrDzNATjnzzK0+o1gZs08rCxN9uU8MuQmpUr0g/tpKMhrAFuEq8rbGHibaIOYakubA8pGm8v52Oo461uF2uh7FCVBu6o7qCTp2lTZeBgACLUA==
James's List:
OwBgTAPgzCIRYoFIBsAWMSzZEghNqmgIxZjECc+aqiWxAHDXjSneU/g7cPRSvkqoo3bMWYC2AVj7I8MtjQ695tJZVwABbUA=

 The Maruts then breaks suppression to show how it's done, blasting the TR bot to scrap—or at least Unconscious-2.
 Then the sneaky bastard moves up to be just inside my HVT's zone of control, meaning I don't get that bonus point either.


